
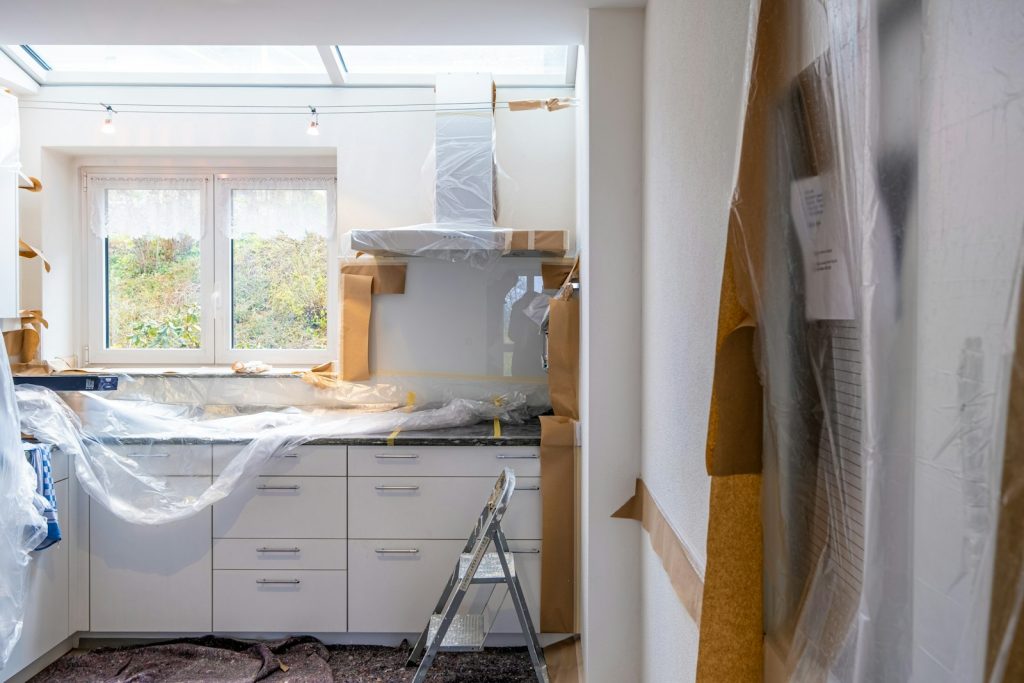
The steps to remodeling a kitchen follow a fixed sequence. First, design the layout and order materials. Next, demolish the old space. Then rough-in plumbing, electrical, and HVAC for the new plan. After that, prep walls and lay any floating floor. Install cabinets next. Countertops are templated and set after cabinets are secure. Painting comes before or with careful masking around cabinets. Finally, hook up appliances and fixtures.
Before those steps begin, set a budget and check permit rules with your city. A remodel takes weeks to months, and you will need a temporary kitchen. The sections below cover money, time, permits, the full sequence, and how to phase the work if funds are tight.
Budget Benchmarks and the 30% Rule
A remodel stalls when the budget is vague. Two separate “30% rules” keep spending in check.
The home value limit
Do not spend more than 30% of your home’s total value on the kitchen. If your house is worth $300,000, keep the kitchen investment under $90,000. This stops you from over-improving compared to nearby homes.
To estimate home value, look at recent sale prices of similar houses on your street. Use that number before setting a remodel cap.
The cabinetry share
Plan to allocate roughly 30% of the remodel budget to cabinetry. Cabinets fill most walls and set the layout. That share leaves room for counters, appliances, and labor.
Cabinetry cost includes boxes, doors, hinges, and pulls. Skimping here often leads to early wear.
Cost ranges by scope
Remodels group into three broad bands:
- Cosmetic: $10,000–$20,000. This covers painting, hardware, refacing, and minor updates.
- Mid-range: $20,000–$60,000. This includes new appliances, flooring, and some layout changes.
- Full gut or high-end: $60,000 and above. This involves structural moves, custom cabinets, and premium finishes.
A mid-range job may replace laminate counters with stone and add a kitchen island. A full gut may remove a wall to open the floor plan. These ranges help you see which tier fits your savings.
The $10,000 question
A $10,000 budget limits the scope to cosmetic changes. You can paint walls, swap hardware, and reface cabinets. You cannot move plumbing, replace all appliances, or change the floor plan.
If your goal is a full layout change, save more before starting. A $10k project done first can still improve daily life.
Contingency fund
Set aside 10–20% of the budget for surprises. Tearing out a wall often reveals water damage or rot. The contingency pays for fixes without halting the project.
For example, a leaking supply line behind drywall can rot studs. The extra money covers replacement lumber and labor. Without it, the job stops until you find funds.
Timeline and Temporary Kitchen Setup
A kitchen remodel displaces your cooking space. The clock starts in planning and ends at final finishing.
Realistic timeline
- Planning: weeks to months, depending on design decisions and material lead times.
- Demolition: a few days to strip the old kitchen.
- Rough-in: 1–2 weeks for plumbing, electrical, and HVAC changes.
- Cabinet and countertop install: 1–3 weeks, accounting for templating and curing.
- Finishing: 1–2 weeks for paint touch-ups, trim, and fixture hookups.
Add buffer time for late deliveries. Appliances and cabinets often arrive late. Use the planning window to compare cabinet lines and finish samples. Decisions made early prevent change orders later.
Temporary kitchen checklist
You can function without a full kitchen by moving key items:
- Relocate the microwave, coffee maker, and fridge to a separate room.
- Set up a dishwashing station in a laundry sink or bathroom.
- Keep a cooler for cold items if the fridge move is temporary.
- Use paper plates and disposable utensils to cut wash load.
A card table in the living room can hold the coffee maker and toaster. Keep a box for utensils you still use.
Site protection
Dust travels. Seal off HVAC vents to stop fine particles from spreading. Cover floors with ram board along the worker path. Mark a clear route from the door to the kitchen so contractors do not track debris through the house.
Close nearby doors with plastic sheeting. This keeps dust out of bedrooms and closets.
Permit Requirements and Inspection Milestones
Permits keep the work legal and safe. Rules differ by city.
Check your city’s building department
If you are near St. Cloud, Sartell, or Sauk Rapids, visit that city’s building department website. Each jurisdiction lists what triggers a permit. A simple cabinet swap may not need one. Moving a gas line always will.
Some cities bundle trades into one permit. Others require separate electrical and plumbing permits. Read the local page closely.
Permit costs
Expect permit fees from $200 to $2,000 or more. The price scales with project scope and local rates.
A full gut with new mechanicals sits at the high end. Cosmetic work may need no fee at all.
Who pulls the permit
Usually the contractor pulls the permit. The homeowner must verify it is filed before work begins. Do not assume the paper is done.
Ask for the permit number and check it online. This protects you from stop-work orders. If you hire a contractor, ask who schedules the inspections. The homeowner should confirm each pass before walls close.
Inspection milestones
Inspectors visit at set points:
- Rough-in inspection: before walls are closed, to check pipes and wires.
- Insulation and drywall inspection: after mechanicals pass and before covering.
- Final inspection: before the space is used for daily cooking.
Schedule these visits early because inspectors have set routes. A missed slot delays closing the walls.
The Step-by-Step Construction Sequence
The order below prevents rework. Skipping a step costs money.
Step 1: Design and Procurement
Lock the layout and exact measurements. Order cabinets and appliances early because lead times are long. Confirm the plan before any demo.
Mistakes in measurement cause delays. Double-check openings for fridges and ovens. Procurement means paying deposits to secure slab colors and door styles.
Step 2: Demolition
Remove old fixtures, cabinets, and flooring. Do not demo without knowing where plumbing and electrical lines are located. Shut off utilities first.
Wear gloves and eye protection. Strip carefully to avoid damaging pipes you plan to keep.
Step 3: Rough-In Framing and Mechanicals
Move plumbing, electrical, and HVAC to new locations. Do not change the layout after this step is approved by inspection. The walls are open for a reason.
This work must meet code and usually requires licensed trades. In the 30-mile St. Cloud area, DG Homes & Remodeling does kitchen remodels that include this step.
Step 4: Wall Prep and Flooring (if floating)
Install drywall and lay floating flooring. If using nail-down or glue-down floor, it often must wait. If using floating floor, it must go in before cabinets to prevent trapping the floor.
Floating types include laminate and vinyl plank. They expand and contract, so leave clearance at edges.
Step 5: Cabinet Installation
Hang upper and lower cabinets. Do not install cabinets without verifying the flooring height will not block appliance openings. Measure the combined height of floor and cabinet base.
Use shims to level. Plumb lines matter for doors to align.
Step 6: Countertop Templating and Installation
Measure the countertop after cabinets are set. Then fabricate and install. Do not buy appliances before confirming cabinet and countertop dimensions. Appliances need clearances.
Stone tops need a few days to cut after template. Schedule accordingly.
Step 7: Painting and Finishing
Paint walls and trim. Do not paint after cabinets are installed to avoid drips on finishes. Paint before cabinet hang, or mask carefully around installed cabinets.
Use a washable sheen near cooking areas. It resists stains.
Step 8: Appliance and Fixture Hookup
Install appliances, connect plumbing, and fit switch plates. This is the last step before the kitchen works again.
Test for leaks and check that outlets work. Then the space is usable.
Phased Remodeling for Limited Budgets
A small budget does not mean no progress. You can reorder steps to get results now.
Cosmetic first
Phase 1: paint walls, replace hardware, update lighting, and add a backsplash. These changes are low cost and reversible.
A new color shifts the room feel fast. New pulls make old doors look fresh.
Layout later
Keep the existing cabinet footprint. Upgrade finishes through refacing now. Save for a full gut renovation later when funds allow.
Refacing keeps boxes but swaps doors. It buys time before a full tear-out.
Risks of phasing
Temporary choices can complicate future work. For example, laying a cheap peel-and-stick floor now may make later demolition harder. Choose temporary materials that are easy to remove.
Avoid permanent changes that conflict with a future layout. Keep plumbing where it is during phase 1.
Sample 3-year plan for a $10k budget
Year 1: Spend the $10,000 on cosmetic updates—paint, hardware, refacing, lighting. The kitchen looks new without moving walls.
Year 2: Save $15,000–$20,000 from income for cabinets and countertops. Keep the cosmetic work intact.
Year 3: Use saved funds for a full gut remodel with moved plumbing and new appliances. The early updates served daily use until then.
This plan spreads cost and avoids debt.
FAQ
What is the 30% rule in remodeling?
There are two versions. First, do not spend more than 30% of the home’s total value on the kitchen. Second, allocate roughly 30% of the remodel budget to cabinetry. Both keep the project balanced and protect resale value.
Is $10,000 enough for a kitchen remodel?
It is enough for cosmetic changes only. That includes painting, hardware, and refacing. It does not cover structural moves, full appliance replacement, or layout changes. Plan a phased approach if the budget is tight.
What not to do when renovating a kitchen?
Do not demolish without locating utilities. Do not change layout after rough-in inspection. Do not install cabinets before checking floor height. Do not buy appliances before confirming dimensions. Do not paint after cabinets are hung without masking. Each prohibition prevents costly rework.
In what order do you do a kitchen remodel?
Design and order materials, demolish, rough-in mechanicals, prep walls and floating floor, install cabinets, template and set countertops, paint, then hook up appliances. Budget and permits come first.
This week, measure your kitchen and note where the water lines and electrical outlets sit. That list will tell you if your project is cosmetic or a full gut.